Serum Tutorial - 25 Serum Tips You Need To Know

If you're like me, when you first started Xfer Serum it seemed almost impossible to learn everything.
Even after watching every Serum tutorial I could find online, there was still so much to discover.
This is why I decided to compile my 25 favorite Serum tips in one place!
These techniques are essential to know for better sound-design and quicker workflow in Xfer Serum.
If you want to read an in depth review of Xfer Serum, click here.
If you prefer watching videos, we also made a Serum tutorial video with these 25 tips that you can watch:
Instead of getting very accurate when changing the mod depth (clicking the tiny blue circle dot), hold “Alt" and click+drag a knob to change the modulation depth.
This method is a little less picky and allows you to quickly modulate parameters.
Copy 1 LFO to another by holding "Alt" and clicking+dragging the LFO1 “tab” (or any LFO) and dropping it on-top of another.
This allows you to easily copy your modulation source to a new LFO to further edit it.
Set the compressor's ratio all the way to the right, to "limit" to turn serum into a limiter.
Unlike most Chorus/Flanger/Phaser units, in Serum you can set the rate to 0 for ultimate control.
This allows you to modulate the parameters yourself instead of using the built in LFO.
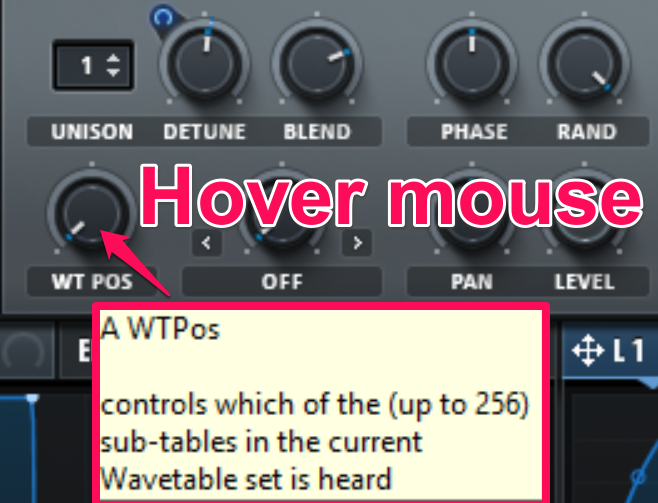
If you're ever confused while using serum, hover your mouse over a parameter and wait, for a “description” window to pop up
That way you can figure out certain parameters without referring to the manual.
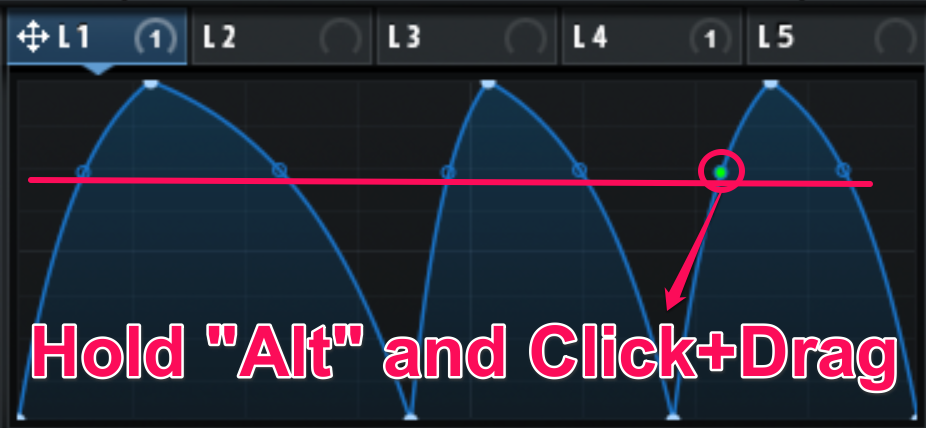
Hold "Alt" while changing LFO curves to change them all at once.
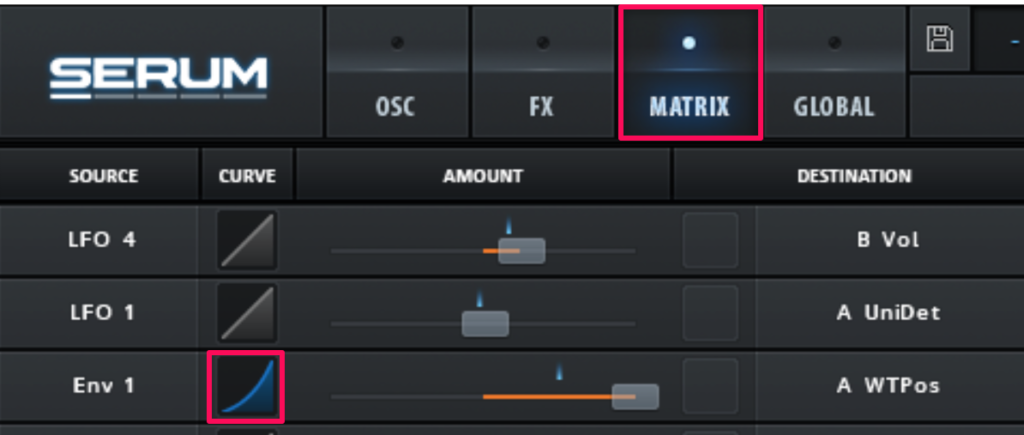
In the “Matrix” tab, it’s possible to adjust the “curve” of modulators.
Click and drag on the curve slope to change it.
This can add an entire new element to your sounds!
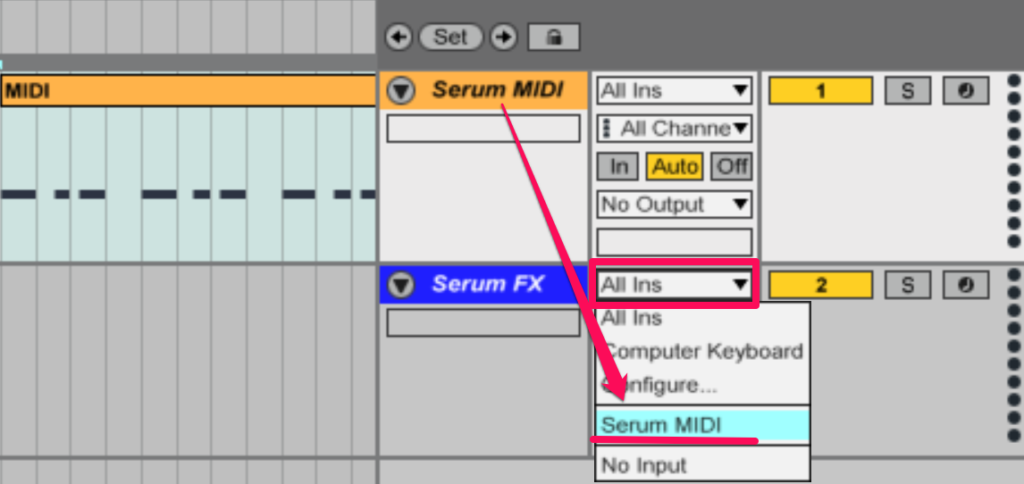
Send MIDI to Serum FX on a separate channel to trigger the envelopes.
A great way to process your sounds further, or even use the FX from Serum on audio or other synths!
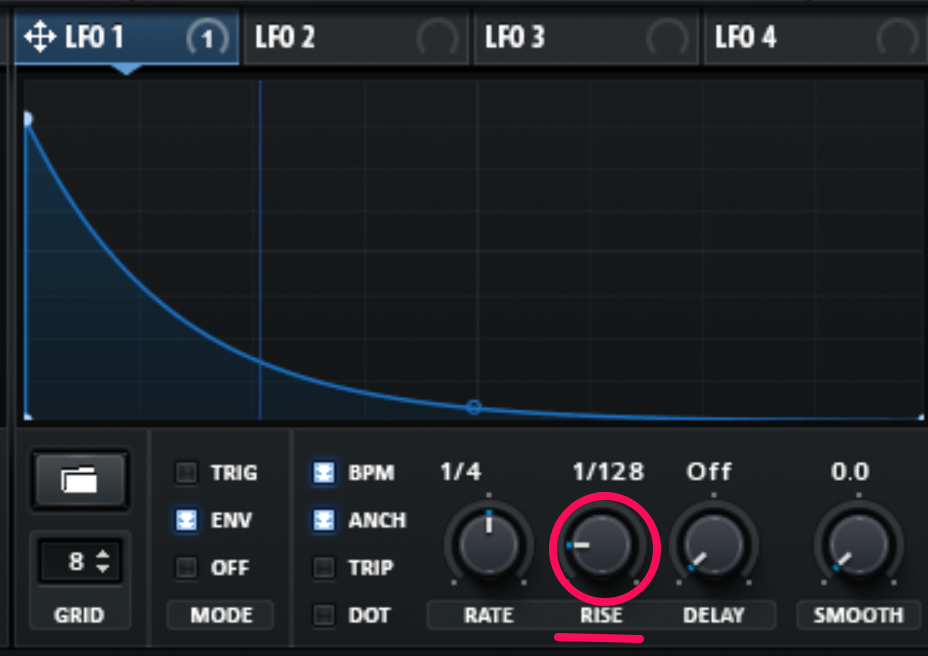
Give your LFOs attack with the "rise" knob.
This means that whatever parameter the LFO is mapped to, it will take 1/128 time of the BPM for the LFO to reach it’s full range of motion.
In Env mode, this behaves as a “fade-into” the envelope.
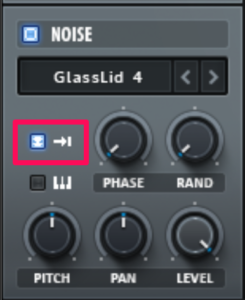
Deactivate the forward facing arrow in Serum for One Shot noise.
This is excellent for percussive bursts on the front of sounds.
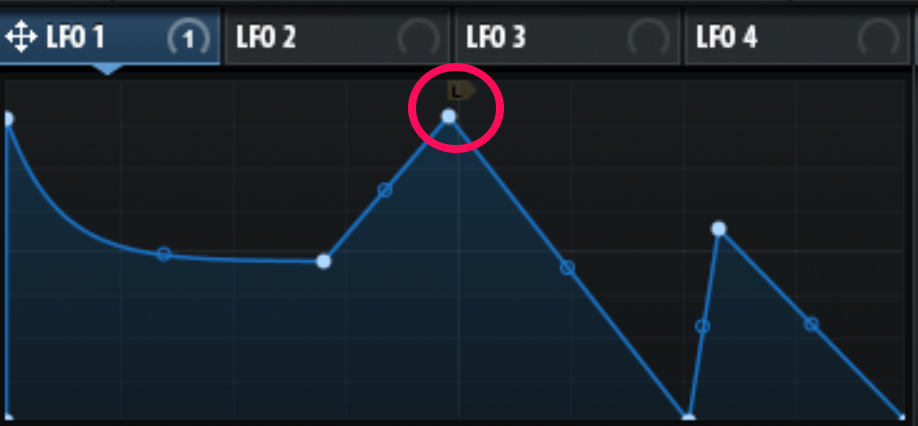
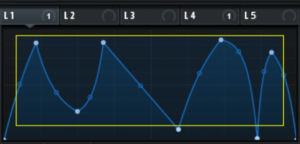
When using an LFO in envelope mode, press Shift+Command+Click (Mac) / Shift+Ctrl+Click (PC) to create a loop point, in which it will continuously loop.
Click on a pre-existing curve node to turn it into a “Loop” point
The grey letter “L” will appear over the node to indicate that it is a looping point.
This allows you to create cool looping LFO shapes.
When moving LFO points, hold “Alt” while dragging a point and it will snap to the grid.
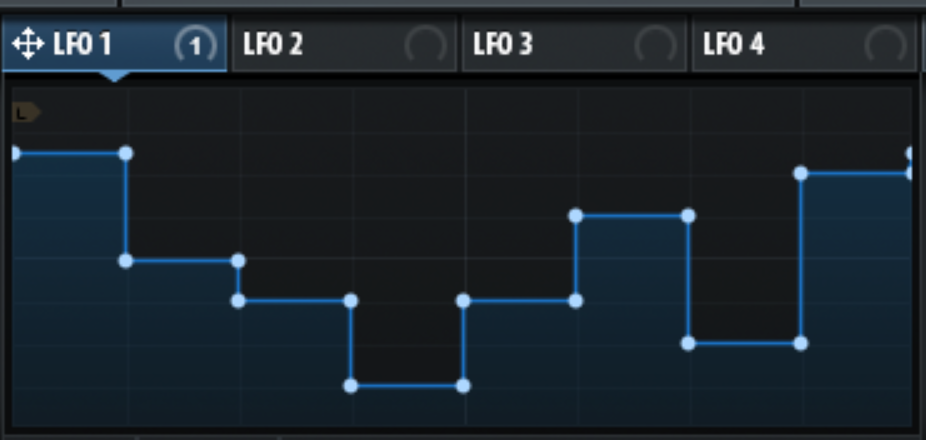
Hold "Shift" to turn your LFO drawing tool into a stepper.
This trick is great for creating arps and sequences!
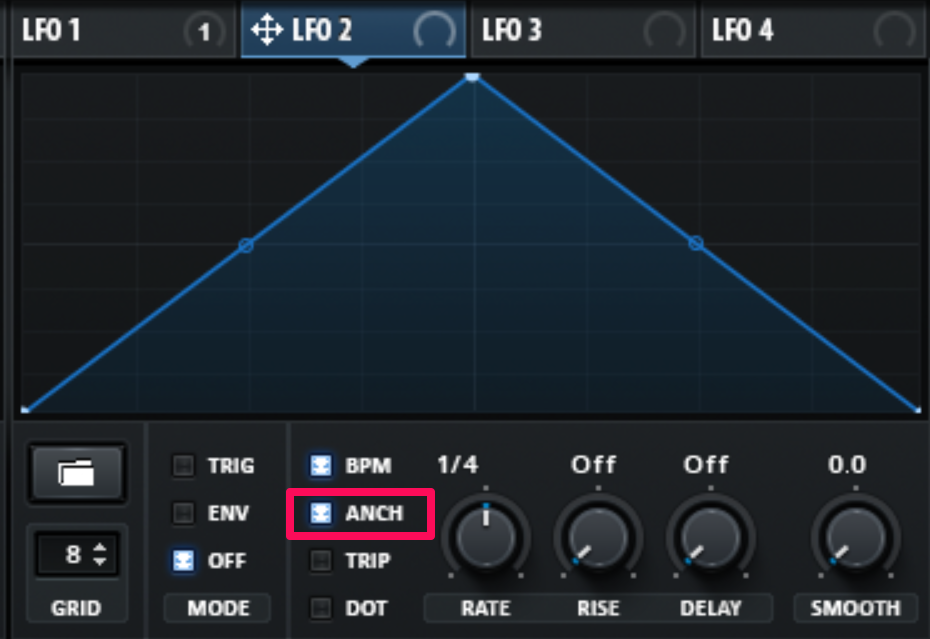
The "Anchor" button in the LFO section is useful for keeping your LFOs perfectly in sync with your song.
However, it may cause skipping if a change is made mid switch.
This can avoided by turning "anchor" off, which may put things out of perfect sync.
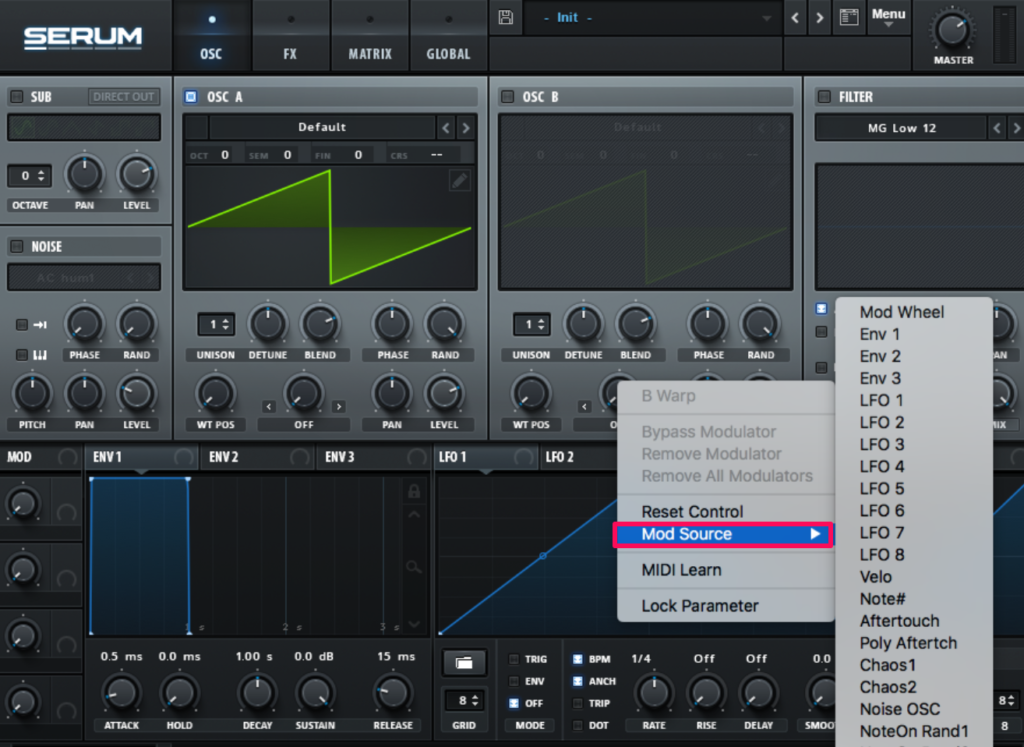
Quickly add mod sources by right-clicking and clicking "Mod Source".
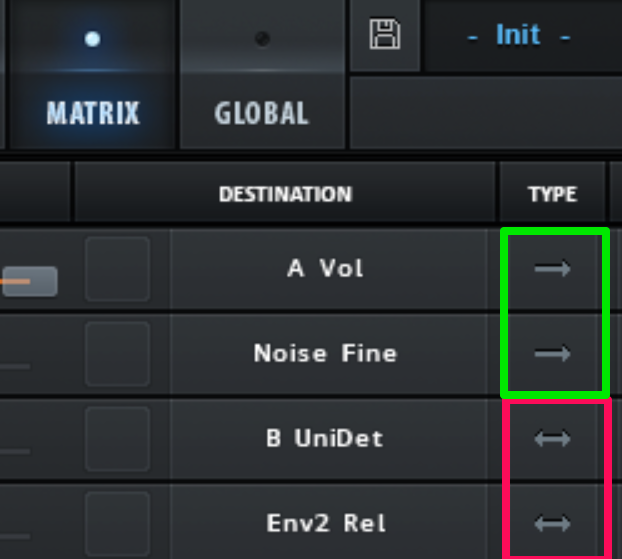
Decide whether a modulation is going unidirectional or bidirectional (one way or both ways) with the direction arrow in the modulation matrix.
This is saying whether it is starting from the beginning or in the middle.
You can change the type between Uni/Bi without visiting the Mod Matrix window by holding “Shift+Alt” while clicking on the knob with a visible modulation assignment.
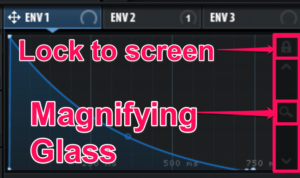
Use the magnifying glass to view longer envelope times or use the lock symbol to lock it to that screen.
Click and drag to select multiple LFO points to change all at once.
Try making the range 7 semitones for example create single oscillator chords with the unison pitch and width control knobs.
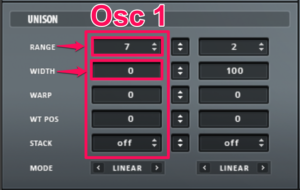
Switch to the “Global” tab and copy these Osc 1 unison settings.
Press Command/Ctrl+Click on any parameter to reset it to it’s default value.
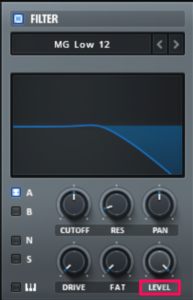
Click “Mix” on the filter section to transform it into ‘Level’ which essentially makes it a gain knob.
This can be super useful if you overdrive the filter using the "Drive" knob and need to compensate the volume.
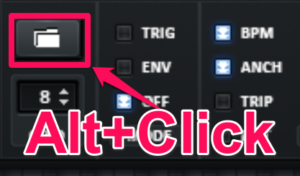
Alt+Click on the LFO Folder to easily cycle through LFO shapes.
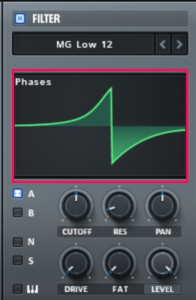
Click on the filter display window to see it’s phases.
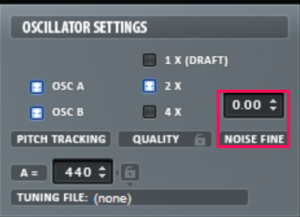
Fine tune the noise under the “Global” tab to tune your tonal sounds that are out of tune
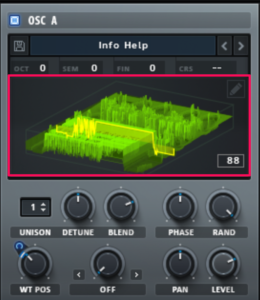
Drag + Drop a PNG picture file into serums waveform display window to use it as a wavetable.
I hope you learned something new from this Serum tutorial!
If you haven't already, I highly encourage you check out our 30 Day Guide to Advanced Bass Design in Serum!
It's a 33 page PDF that goes WAY more in depth than this article did, and it gives you daily tasks to complete that will advance your sound design faster than you could ever imagine...
It also includes tons of daily videos to show you step by step how to complete each daily task.
So if you're looking to step up your sound design, go check it out: CLICK HERE
If you have any questions about this article, comment below and we will help you out!
Even after watching every Serum tutorial I could find online, there was still so much to discover.
This is why I decided to compile my 25 favorite Serum tips in one place!
These techniques are essential to know for better sound-design and quicker workflow in Xfer Serum.
If you want to read an in depth review of Xfer Serum, click here.
If you prefer watching videos, we also made a Serum tutorial video with these 25 tips that you can watch:
Tip 1: Hold "Alt" While Clicking a Knob
Instead of getting very accurate when changing the mod depth (clicking the tiny blue circle dot), hold “Alt" and click+drag a knob to change the modulation depth.
This method is a little less picky and allows you to quickly modulate parameters.
Tip 2: Copy an LFO To Another
Copy 1 LFO to another by holding "Alt" and clicking+dragging the LFO1 “tab” (or any LFO) and dropping it on-top of another.
This allows you to easily copy your modulation source to a new LFO to further edit it.
Tip 3: The Compressor is a Limiter
Set the compressor's ratio all the way to the right, to "limit" to turn serum into a limiter.
Tip 4: Chorus/Flanger/Phaser - 0 Rate
Unlike most Chorus/Flanger/Phaser units, in Serum you can set the rate to 0 for ultimate control.
This allows you to modulate the parameters yourself instead of using the built in LFO.
Tip 5: Mouse Over Help
If you're ever confused while using serum, hover your mouse over a parameter and wait, for a “description” window to pop up
That way you can figure out certain parameters without referring to the manual.

Tip 6: Change All LFO Curves At Once
Hold "Alt" while changing LFO curves to change them all at once.

Tip 7: Add Curves To Modulators For Nonlinear Curves
In the “Matrix” tab, it’s possible to adjust the “curve” of modulators.
Click and drag on the curve slope to change it.
This can add an entire new element to your sounds!

Tip 8: Serum FX Envelope Trigger
Send MIDI to Serum FX on a separate channel to trigger the envelopes.
A great way to process your sounds further, or even use the FX from Serum on audio or other synths!

Tip 9: Give Your LFOs Attack
Give your LFOs attack with the "rise" knob.
This means that whatever parameter the LFO is mapped to, it will take 1/128 time of the BPM for the LFO to reach it’s full range of motion.
In Env mode, this behaves as a “fade-into” the envelope.

Tip 10: "One Shot" Noise Mode
Deactivate the forward facing arrow in Serum for One Shot noise.
This is excellent for percussive bursts on the front of sounds.

Tip 11: Loop LFOs In Envelope Mode
When using an LFO in envelope mode, press Shift+Command+Click (Mac) / Shift+Ctrl+Click (PC) to create a loop point, in which it will continuously loop.
Click on a pre-existing curve node to turn it into a “Loop” point
The grey letter “L” will appear over the node to indicate that it is a looping point.
This allows you to create cool looping LFO shapes.

Tip 12: Lock LFO Points To Grid
When moving LFO points, hold “Alt” while dragging a point and it will snap to the grid.
Tip 13: Turning LFOs Into Steppers
Hold "Shift" to turn your LFO drawing tool into a stepper.
This trick is great for creating arps and sequences!

Tip 14: LFO "Anchor" Button
The "Anchor" button in the LFO section is useful for keeping your LFOs perfectly in sync with your song.
However, it may cause skipping if a change is made mid switch.
This can avoided by turning "anchor" off, which may put things out of perfect sync.

Tip 15: Quickly Add Modulators
Quickly add mod sources by right-clicking and clicking "Mod Source".

Tip 16: Uni/Bi Directional Modulators
Decide whether a modulation is going unidirectional or bidirectional (one way or both ways) with the direction arrow in the modulation matrix.
This is saying whether it is starting from the beginning or in the middle.

You can change the type between Uni/Bi without visiting the Mod Matrix window by holding “Shift+Alt” while clicking on the knob with a visible modulation assignment.
Tip 17: Envelope Magnifying Glass
Use the magnifying glass to view longer envelope times or use the lock symbol to lock it to that screen.

Tip 18: Change All LFO Points At Once
Click and drag to select multiple LFO points to change all at once.

Tips 19: Single Oscillator Chords
Try making the range 7 semitones for example create single oscillator chords with the unison pitch and width control knobs.

Switch to the “Global” tab and copy these Osc 1 unison settings.
Tip 20: Reset Any Parameter
Press Command/Ctrl+Click on any parameter to reset it to it’s default value.
Tip 21: Change "Mix" To Level
Click “Mix” on the filter section to transform it into ‘Level’ which essentially makes it a gain knob.
This can be super useful if you overdrive the filter using the "Drive" knob and need to compensate the volume.

Tip 22: Quickly Scroll Through LFOs
Alt+Click on the LFO Folder to easily cycle through LFO shapes.

Tip 23: Filter To Phase
Click on the filter display window to see it’s phases.

Tip 24: Fine Tune Your Noise
Fine tune the noise under the “Global” tab to tune your tonal sounds that are out of tune

Tip 25: Turn Pictures Into Wavetables
Drag + Drop a PNG picture file into serums waveform display window to use it as a wavetable.

Conclusion
I hope you learned something new from this Serum tutorial!
If you haven't already, I highly encourage you check out our 30 Day Guide to Advanced Bass Design in Serum!
It's a 33 page PDF that goes WAY more in depth than this article did, and it gives you daily tasks to complete that will advance your sound design faster than you could ever imagine...
It also includes tons of daily videos to show you step by step how to complete each daily task.
So if you're looking to step up your sound design, go check it out: CLICK HERE
If you have any questions about this article, comment below and we will help you out!

